Published: Aug 9, 2023 by Alistair
This is a guide on running Tock and RadioLib on a SparkFun expLoRaBLE Thing Plus to send temperature data over LoRa.
LoRa
LoRa (Long Range) is a radio communication technique that uses spread spectrum modulation technique derived from chirp spread spectrum (CSS) technology.
LoRa provides a number of properties including:
- long range, can cover tens of kilometres
- low power, devices can run for years
- reasonably secure
- standardised
- relativity cheap
SparkFun expLoRaBLE Thing Plus
The SparkFun expLoRaBLE Thing Plus is a Feather-footprint development board with the NM180100 system in package (SiP), from Northern Mechatronics. This includes a Ambiq Apollo3 microcontroller and the Semtech SX1262 LoRa transceiver in a single SoC.
Tock
Tock is an embedded operating system (OS) written in Rust. It is designed for running multiple concurrent, mutually distrustful applications on Cortex-M and RISC-V based embedded platforms. Tock’s design centres around protection, both from potentially malicious applications and from device drivers.
Tock has support for the Ambiq Apollo3 microcontroller and the SparkFun expLoRaBLE Thing Plus. Using these and RadioLib we can run a LoRa application
RadioLib
RadioLib allows its users to integrate all sorts of different wireless communication modules, protocols and even digital modes into a single consistent system.
RadioLib supports the SX1262 LoRa transceiver and supports running as a Tock application.
Setting up the hardware
For the communication we need two boards, one to send data and one to receive. We also want some interesting data to send.
Transmitter
- SparkFun LoRa Thing Plus - expLoRaBLE
- Antenna
- Environment Monitor (the base BME280 should also work)
- Qwiic cable
You can connect the sensor to the board using Qwiic cables
Receiver
Flashing the transmitter
Each board is going to run a different application. Although each will use the same kernel image. To keep things clear we are going to flash one at a time.
Tock
There are full steps in Tock, but these are some simple ones.
First plug in the board.
Then install Rust, you can use rustup for this: https://www.rust-lang.org/tools/install
Then clone and build Tock.
git clone https://github.com/tock/tock.git
cd boards/apollo3/lora_things_plus
make flash
That’s it! The Tock kernel is now on your board. Next we want to flash our application
RadioLib
There are also detailed instructions in the RadioLib repo. But the simple instructions are
git clone --recursive https://github.com/jgromes/RadioLib.git
cd examples/NonArduino/Tock
./build.sh
You will want to change the application to something more interesting, this is a good example for main.cpp:
/*
  RadioLib Non-Arduino Tock Library test application

  Licensed under the MIT License

  Copyright (c) 2023 Alistair Francis <alistair@alistair23.me>
*/

// include the library
#include <RadioLib.h>

// include the hardware abstraction layer
#include "libtockHal.h"

// Include some libtock-c helpers
#include <libtock/temperature.h>
#include <libtock/humidity.h>

#define BUFFER_LEN 64

// the entry point for the program
int main(void) {
  char buffer[BUFFER_LEN];

  printf("[SX1261] Initialising Radio ... \n");

  // create a new instance of the HAL class
  TockHal* hal = new TockHal();

  // now we can create the radio module
  // pinout corresponds to the SparkFun LoRa Thing Plus - expLoRaBLE
  // NSS pin:   0
  // DIO1 pin:  2
  // NRST pin:  4
  // BUSY pin:  1
  Module* tock_module = new Module(hal, RADIO_NSS, RADIO_DIO_1, RADIO_RESET, RADIO_BUSY);
  SX1262* radio = new SX1262(tock_module);

  // Setup the radio
  // The settings here work for the SparkFun LoRa Thing Plus - expLoRaBLE
  int state = radio->begin(915.0, 125.0, 9, 7, RADIOLIB_SX126X_SYNC_WORD_PRIVATE, 10, 8, 0, false);

  if (state != RADIOLIB_ERR_NONE) {
    printf("failed, code %d\r\n", state);
    return 1;
  }
  printf("success!\r\n");

  int temp = 0;
  unsigned humi = 0;

  // loop forever
  for(;;) {
    // Ensure there are no pending callbacks
    yield_no_wait();

    // Read some sensor data from the board
    temperature_read_sync(&temp);
    humidity_read_sync(&humi);

    snprintf(buffer, BUFFER_LEN, "Temp: %d, Hum: %u", temp, humi);

    // send a packet
    printf("[SX1261] Transmitting '%s' \r\n", buffer);

    state = radio->transmit(buffer);

    if(state == RADIOLIB_ERR_NONE) {
      // the packet was successfully transmitted
      printf("success!\r\n");

      // wait for a second before transmitting again
      hal->delay(1000);
    } else {
      printf("failed, code %d\r\n", state);
    }
  }

  return 0;
}
With the application built you will want to flash it from the Tock repo
# Make sure you are in the Tock board repo
# This is where you ran make flash before
# <Tock>/boards/apollo3/lora_things_plus
# Change the path for the APP to point to the tock-sx1261.tbf file
APP=RadioLib/examples/NonArduino/Tock/build/tock-sx1261.tbf make flash-app
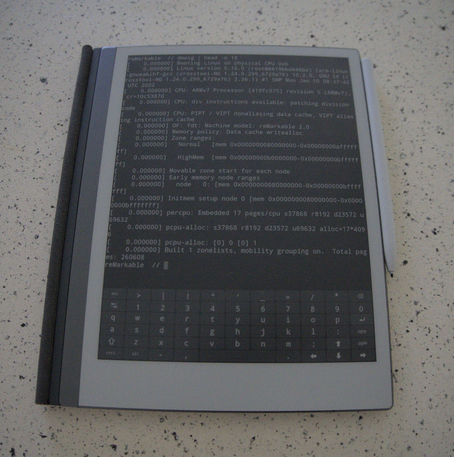
That’s it! Now your board is running Tock and an application. You can see it running over the serial interface with
screen /dev/ttyUSB2 115200
Flashing the receiver
You can now unplug your transmitter.
You can leave it plugged in, but you need to specify a different PORT, so let’s just unplug it for now.
Tock
This is exactly the same as above.
RadioLib
This is also exactly the same, except we want to change main.cpp to receive data in a loop. So replace main.cpp with this
/*
  RadioLib Non-Arduino Tock Library test application

  Licensed under the MIT License

  Copyright (c) 2023 Alistair Francis <alistair@alistair23.me>
*/

// include the library
#include <RadioLib.h>

// include the hardware abstraction layer
#include "libtockHal.h"

// Include some libtock-c helpers
#include <libtock/temperature.h>
#include <libtock/humidity.h>

#define BUFFER_LEN 64

// the entry point for the program
int main(void) {
  char buffer[BUFFER_LEN];

  printf("[SX1261] Initialising Radio ... \n");

  // create a new instance of the HAL class
  TockHal* hal = new TockHal();

  // now we can create the radio module
  // pinout corresponds to the SparkFun LoRa Thing Plus - expLoRaBLE
  // NSS pin:   0
  // DIO1 pin:  2
  // NRST pin:  4
  // BUSY pin:  1
  Module* tock_module = new Module(hal, RADIO_NSS, RADIO_DIO_1, RADIO_RESET, RADIO_BUSY);
  SX1262* radio = new SX1262(tock_module);

  // Setup the radio
  // The settings here work for the SparkFun LoRa Thing Plus - expLoRaBLE
  int state = radio->begin(915.0, 125.0, 9, 7, RADIOLIB_SX126X_SYNC_WORD_PRIVATE, 10, 8, 0, false);

  if (state != RADIOLIB_ERR_NONE) {
    printf("failed, code %d\r\n", state);
    return 1;
  }
  printf("success!\r\n");

  printf("[SX1261] Receiving...\r\n");

  // loop forever
  for(;;) {
    // Ensure there are no pending callbacks
    yield_no_wait();

    state = radio->receive((uint8_t*)buffer, BUFFER_LEN);

    if(state == RADIOLIB_ERR_NONE) {
      // the packet was successfully transmitted
      printf("success!: %s\r\n", buffer);

      // wait for a second before transmitting again
      hal->delay(1000);
    } else {
      printf("failed, code %d\r\n", state);
    }
  }

  return 0;
}
NOTE: If it’s easier you can use this main.cpp and comment/uncomment the SEND macro as required.
Send some data
That’s it! One board is now transmitting data over LoRa and another is receiving data. You can move the boards around and read what is happening over the serial console.
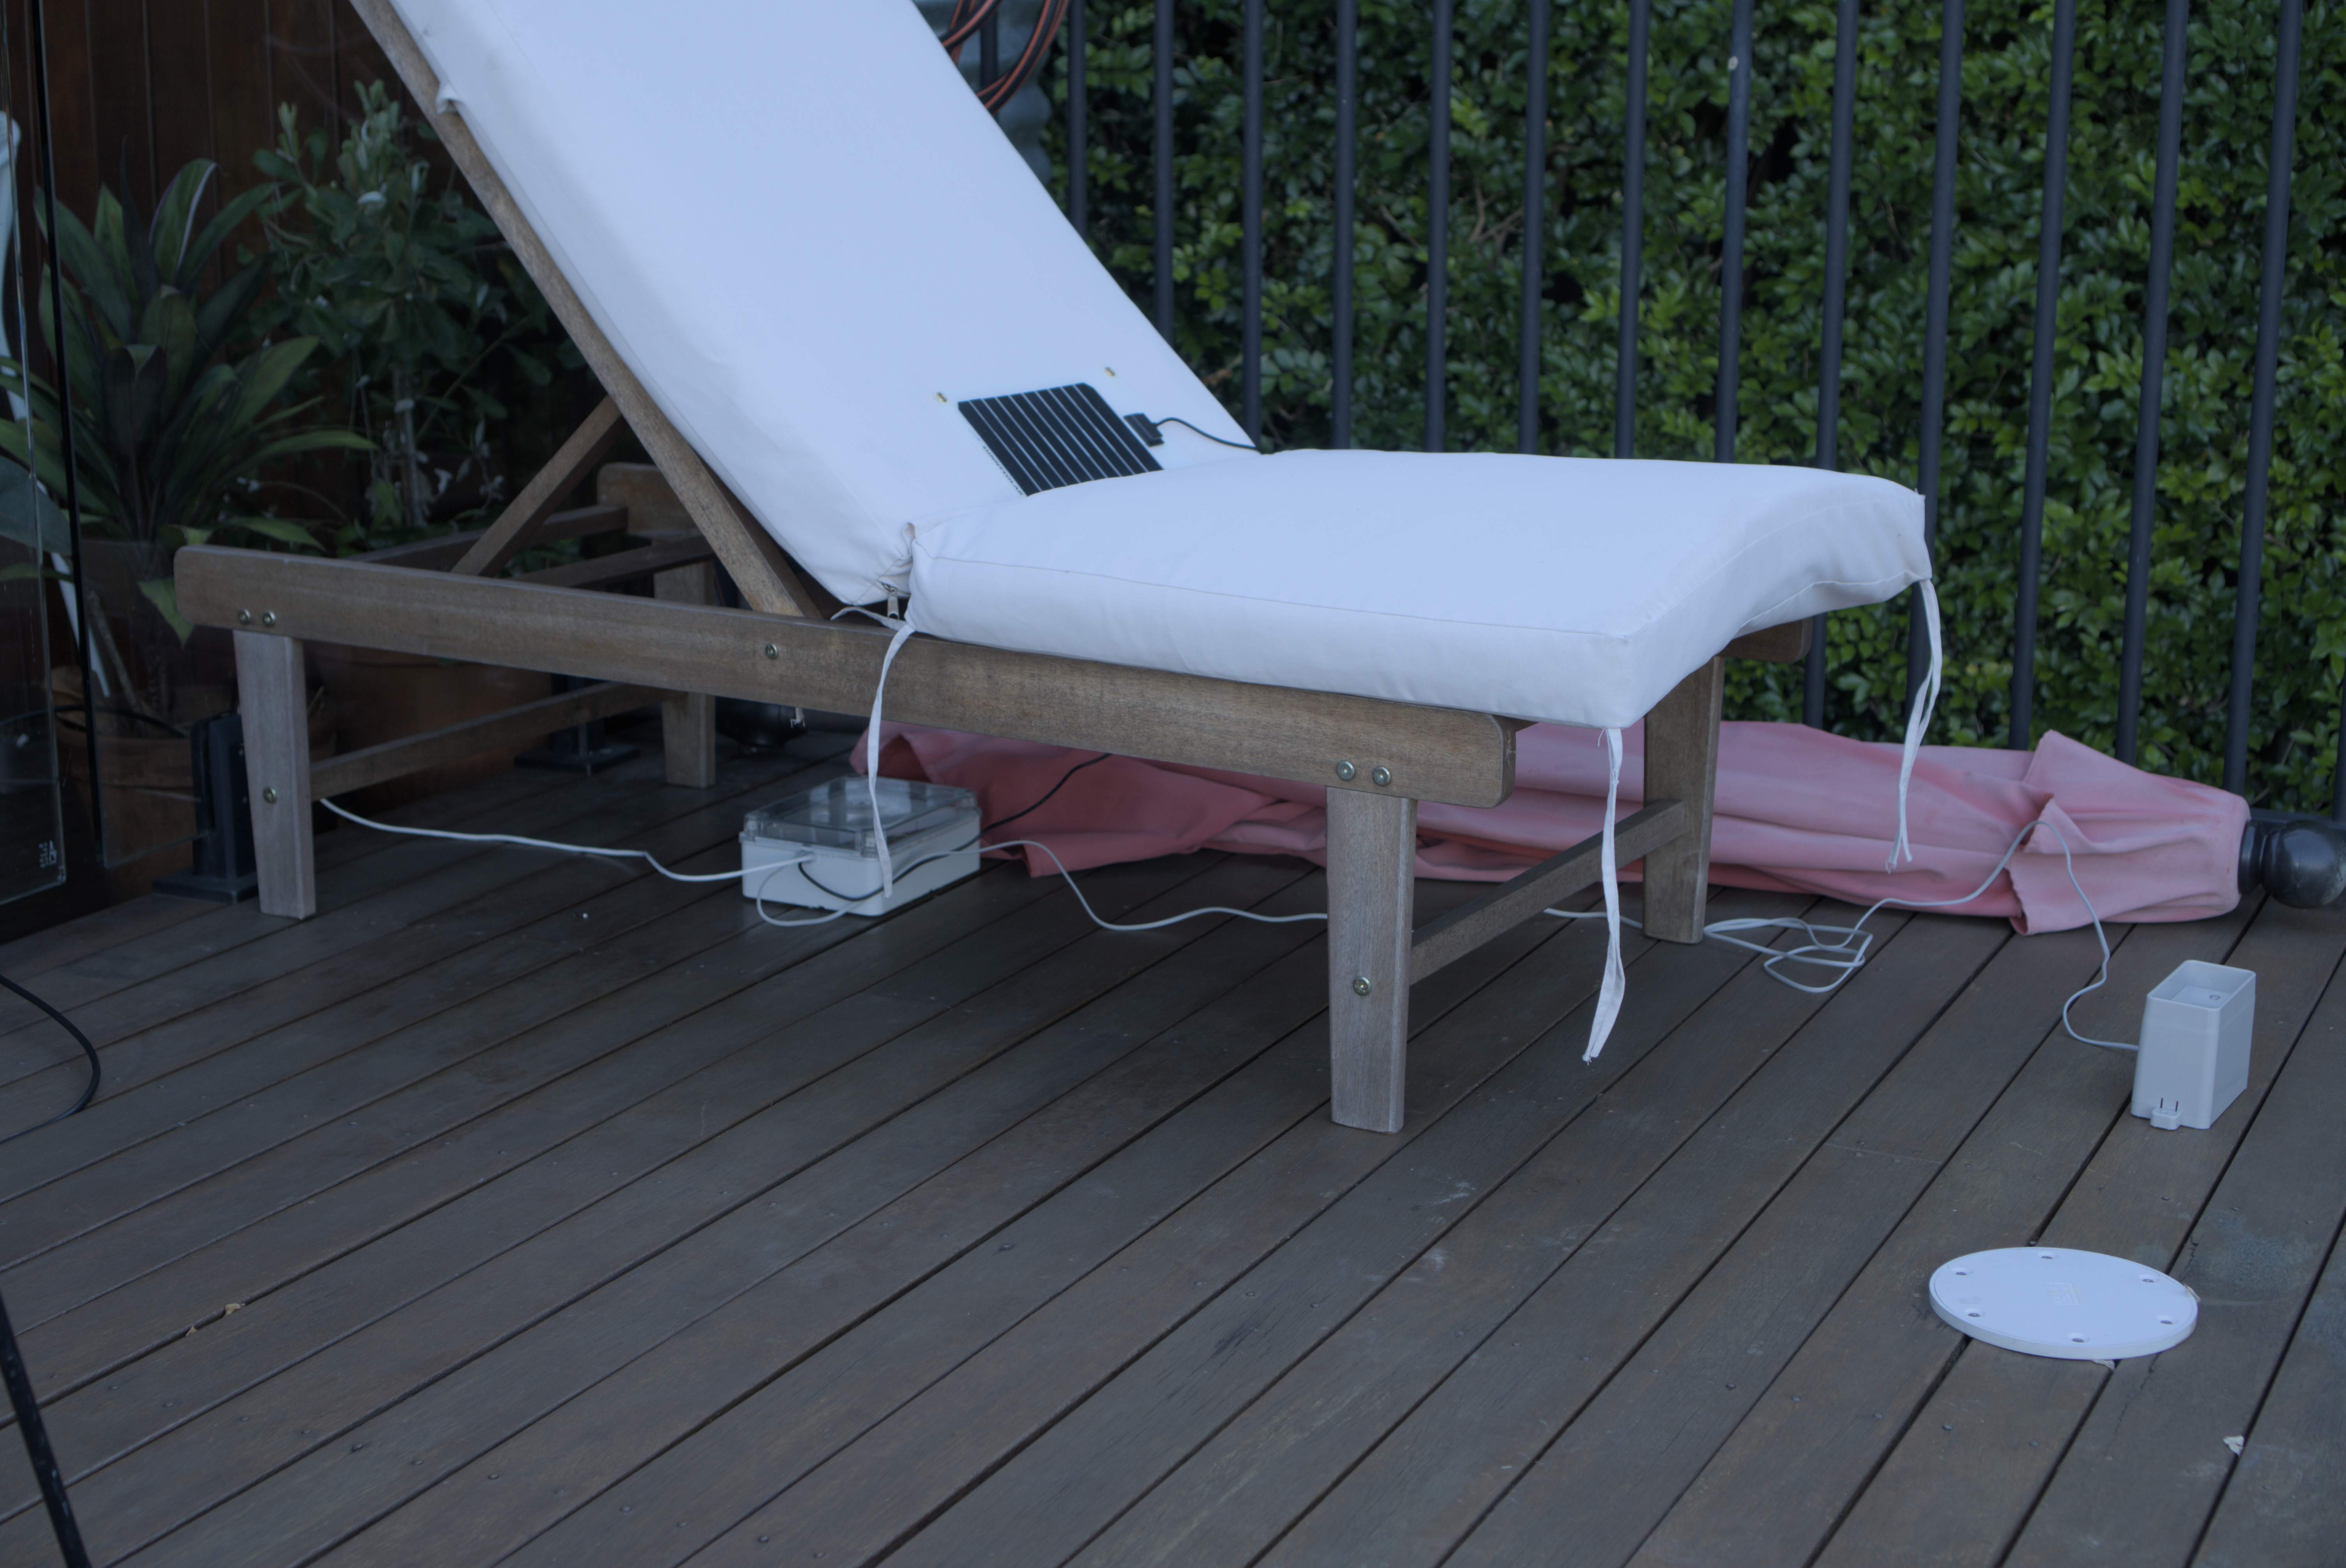
You can power the sender device from a USB power bank, leave it in the backyard and then read the information from the receiver plugged into your computer.
Hopefully you can follow the above steps. If you have any issues just raise an issue at: https://github.com/alistair23/alistair23.github.io